Introduction to Restoring Oil Lamps
Oil lamps offer both functional and decorative benefits, making them popular items for restoration projects. These lamps, with their appealing design and rich history, can transform an ordinary room into an inviting space with vintage charm. However, the process of restoring an oil lamp involves more than simply cleaning it. It requires a careful blend of cleaning, repair, and occasionally, part replacement to maintain both its aesthetic value and historical significance. This article offers a step-by-step guide to achieving a successful oil lamp restoration.
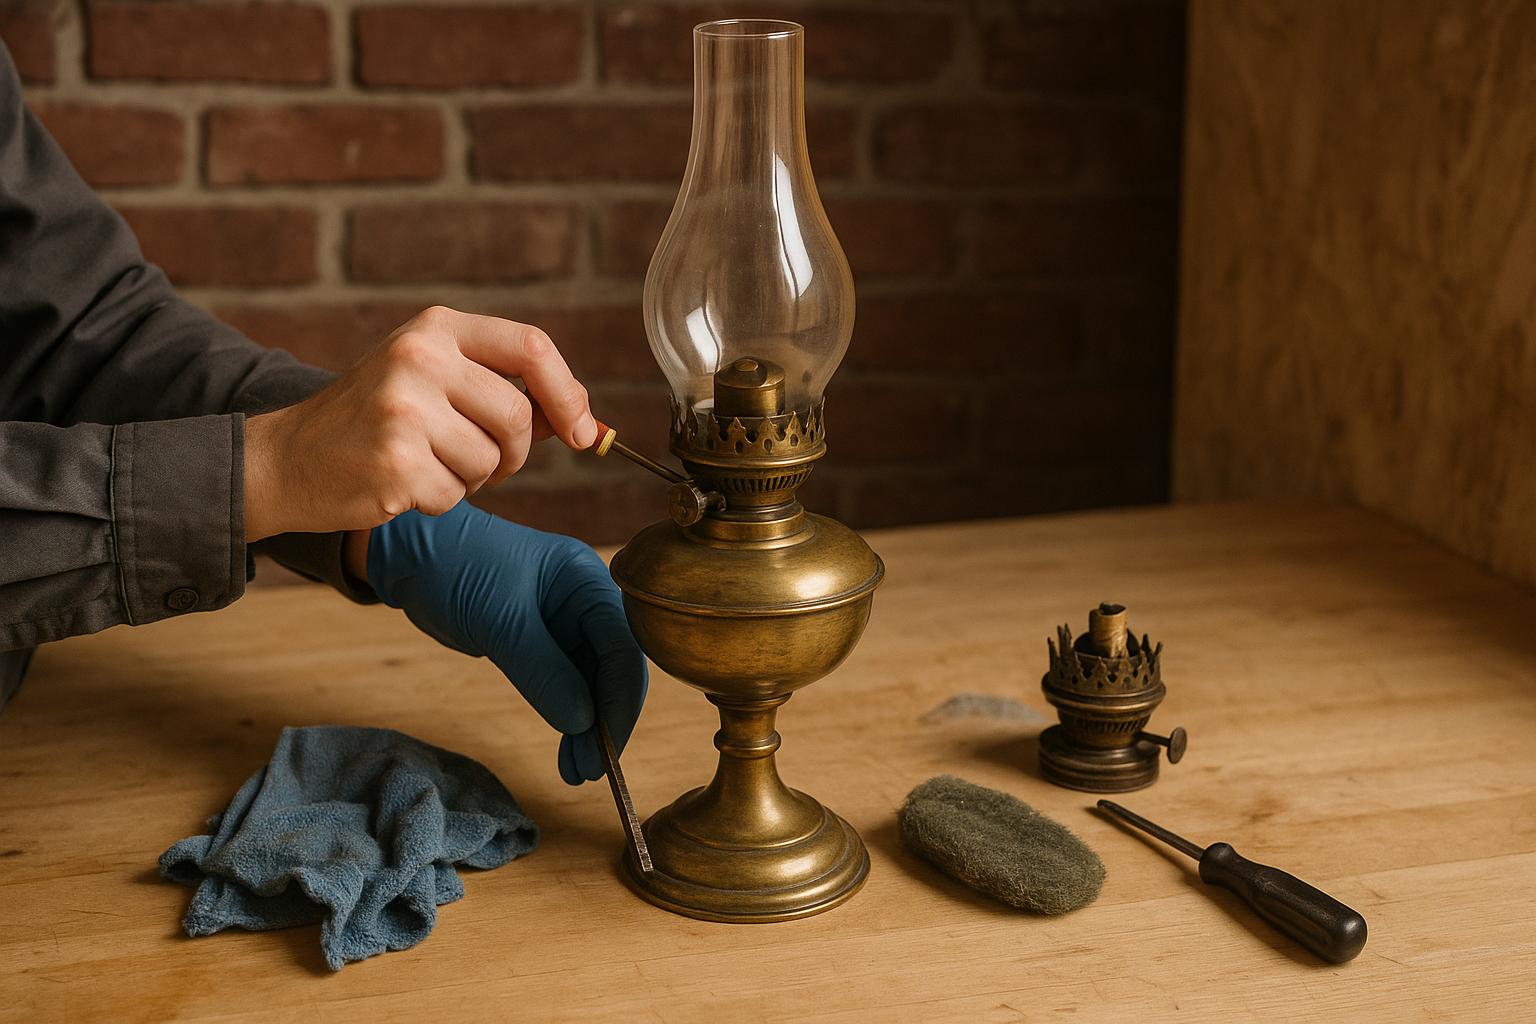
Understanding the Components of an Oil Lamp
Understanding the physical makeup of an oil lamp is crucial before beginning restoration. Typically, an oil lamp is composed of four main parts: the base, burner, chimney, and wick.
The base serves as the reservoir for the fuel, often oil, that powers the lamp. It’s vital to ensure that the base is free from leaks, as this is crucial for both safety and functionality. Leaky bases can lead to inefficient lamp function or even hazards like spills that might pose a fire risk.
The burner is a critical part that regulates the flow of oil to the wick. It ensures that the wick receives enough fuel to keep the flame steady. The burner also holds the wick in place, preventing it from slipping down into the oil base or becoming misaligned, which could disrupt the lamp’s function.
The chimney, typically made of glass, surrounds the flame and prevents it from flickering due to drafts. It also focuses the light and protects the flame from extinguishing abruptly. Keeping the chimney clean and crack-free is essential for maintaining an even, bright light.
Finally, the wick is the component that draws oil up from the base to feed the flame. Ensure that the wick is made of quality materials that efficiently absorb oil. Understanding these components will help highlight issues that may need attention during the restoration process.
Initial Assessment
Before diving into the actual restoration steps, a comprehensive assessment of the oil lamp is essential. Begin by scrutinizing every component for damage such as rust, corrosion, cracks, or missing parts.
Examine the glass chimney carefully, as cracks or chips can pose safety concerns. Check all metal components for signs of rust, which can compromise the structural integrity of the lamp. It’s crucial to determine whether the lamp is viable for restoration, as certain damages might render it beyond practical repair.
Cleaning the Lamp
Cleaning is perhaps the most step in the restoration process. Start by using a soft cloth to remove dust and superficial dirt from the lamp’s surfaces. For more stubborn dirt or grime, prepare a solution of mild soap in warm water. Carefully wash each part without submerging delicate components like the wick or burner.
After washing, take care to dry all parts thoroughly, as moisture can contribute to rust, especially on metal elements like the burner or base. For lamps with brass or other metallic finishes, consider using a non-abrasive polish to restore their natural luster. Avoid any harsh or abrasive cleaning agents that might scratch or damage these components.
Repairing or Replacing Parts
During the restoration process, you might encounter parts that need replacement. Wicks are relatively easy to replace and widely available at specialty lighting stores or online. Keep in mind that the wick should be the correct size for your specific burner to ensure proper function.
When it comes to replacing the chimney, ensure that it’s a perfect match in both size and design to your burner. Compatibility between the chimney and burner is crucial for both operational success and maintaining the lamp’s original aesthetic.
In cases where the base or burner exhibits severe damage like cracks or warping, you may require the services of professional restorers or look for alternatives such as replicas and parts from other vintage lamps.
Reassembling and Final Touches
Once you have cleaned and repaired the necessary components, your next step is to reassemble the lamp. Carefully align each part, ensuring it fits securely and stably. Glass components require particular attention during reassembly, as they are delicate and prone to breaking if handled roughly.
Consider filling the base with a small amount of clean lamp oil to test the lamp’s functionality, such as checking if the wick draws up oil efficiently and the burner regulates flame size adequately. However, if you intend the lamp for display purposes only, this step can be skipped.
Maintaining the Restored Oil Lamp
To prolong the life and beauty of your restored oil lamp, regular maintenance is recommended. Dust the lamp regularly with a soft cloth to prevent dust accumulation, which might affect its appearance and function.
Periodically inspect the lamp for signs of wear or any new damage, especially if you use it occasionally. Avoid exposing the lamp to direct sunlight for extended periods, as UV rays can volatilize some materials or fade colors.
Conclusion
Restoring an antique oil lamp can offer a rewarding experience, blending historical preservation with practical lighting solutions. By understanding its components, thoroughly assessing its condition, and approaching each step methodically, you can reinvigorate these fascinating artifacts. Not only will you enhance the decor in your home, but you’ll also preserve a piece of history for future generations to appreciate and enjoy. The care and dedication invested in the restoration process will pay dividends as your lamp shines elegantly within any setup.