Introduction
Refinishing a painted vintage lamp is not just about aesthetics; it’s a journey that intertwines art and craftsmanship. Whether you’re passionate about antiques or just wish to update a piece of your home’s decor, refinishing can remarkably transform a vintage lamp. This guide will walk you through the necessary steps to ensure your vintage lamp is restored or updated with the care it deserves.
Initial Assessment
The process begins with a thorough examination of your vintage lamp to understand its current state and any specific challenges that might arise. A detailed inspection will not only flag potential repairs but also help in planning the entire refinishing process efficiently. Checking for signs of wear, such as cracks or broken components, is crucial. Moreover, if the lamp includes wiring, a safety inspection is required to determine if rewiring is needed.
Identifying Material
Understanding the material composition of your lamp is essential since refinishing techniques can vary widely between materials such as metal, wood, or ceramic. Knowing the material helps in selecting the right products and methods for paint removal, sanding, and subsequent finishing.
Materials Needed
The actual refinishing process requires a set of specific materials and tools. Accumulating these beforehand will streamline the operation. These materials include:
- Sandpaper: Medium and fine grit will be necessary for smoothing surfaces.
- Paint stripper: It is important to choose one appropriate for the lamp’s material to effectively remove old paint.
- Cleaning supplies: Soft cloths, sponges, and a gentle cleaning solution will ensure the lamp is clean and free of debris.
- Painting tools: Such as brushes or spray equipment for applying the new finish.
- Safety gear: Gloves, mask, and goggles will protect you during the process.
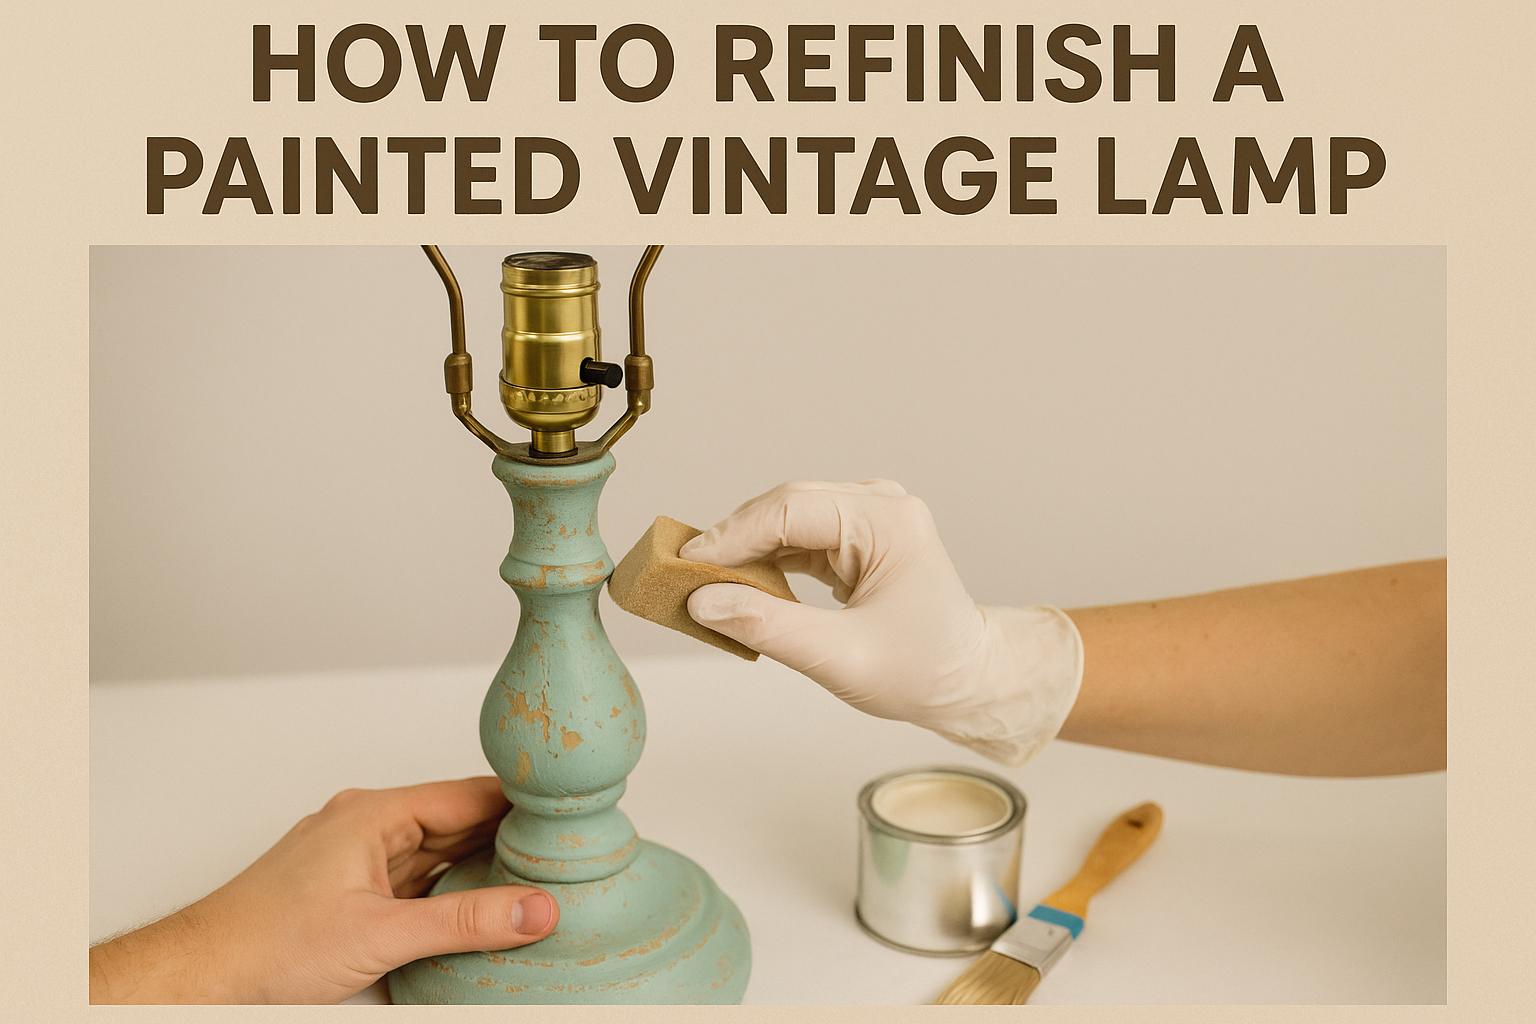
Removing Old Paint
The removal of old paint should be conducted in a well-ventilated area for safety and efficiency. Masking tape can be used to protect areas such as the light socket or wiring that should not be exposed to chemicals or scraping. The application of the paint stripper should follow the instructions provided by the manufacturer, with careful attention to detail to avoid damaging the lamp’s material. Once the old paint starts to peel away, a scraper or wire brush will assist in cleaning the surface. For intricate carvings, a small toothbrush or scrubbing brush will help access hard-to-reach areas. Ensure all stripper residues are thoroughly washed off with mild soap and water.
Sanding and Surface Preparation
Once the lamp is paint-free and dry, it is crucial to sand the surface to remove any residual paint and imperfections. Start with medium-grit sandpaper and finish with a fine-grit for a smooth, even surface. Removing dust after sanding is achieved by wiping the lamp with a damp cloth. This step is vital for ensuring a smooth application of primer and paint.
Repair and Restoration
Prior to painting, address any damage to the lamp. This could range from filling cracks to tightening loose joints. For wooden lamps, wood filler will be suitable, while other materials might require specific repair compounds. Allow ample drying time for all repairs before proceeding with the finish.
Painting or Finishing
The refinishing phase begins with selecting an appropriate paint or finish that aligns with the lamp’s material and your chosen aesthetic. Primer serves as a foundation enhancing paint adhesion and might be necessary if you are altering the lamp’s original color significantly. Apply primer evenly and let each coat dry thoroughly before applying the next, following with the paint application. Use thin, even layers to achieve the best result, preventing runs and ensuring comprehensive coverage.
Choosing Paint or Finish
When choosing a paint or finish, consider durability, ease of application, and the final appearance. Water-based paints typically dry faster and emit fewer odors, whereas oil-based options often provide a more durable finish. The aesthetic outcome can differ substantially, so test the product on a small area first if uncertain.
Reassembly and Final Touches
Upon ensuring that the paint or finish is completely dry, begin reassembling the lamp. Secure any parts that were removed during the stripping and painting process. For lamps that were rewired, a thorough check of the electrical connections is imperative. Test the lamp to confirm it functions correctly before final installation.
Cleaning and Maintenance
Maintaining the appearance and condition of your refinished lamp is an ongoing task. Regular dusting with a soft cloth will preserve its shine. Avoid using abrasive cleaners which could damage the delicate surface. Periodic inspections for new signs of wear will allow immediate interventions, maintaining the lamp’s beauty and functionality.
With diligence and attention to detail, transforming a vintage lamp through refinishing isn’t solely about restoration; it’s a creative pursuit offering your home a piece with renewed life and historical charm. Whether maintaining its vintage character or bestowing it with a contemporary flair, the care and effort invested in this process invariably culminate in an object of both beauty and personal significance.